So let’s get to it then.
What you will need:
1. A Linux OS and a way to install it, such as with a USB thumb drive, or CD or DVD.
2. A computer with some Extra Hard Drive space.
For this tutorial and most others I will be using the current version of Ubuntu which is v10.10. I am using the 64-bit edition of Ubuntu, but if your computer can’t handle 64-bit (if you are not sure it probably cannot, but check anyway) then use 32-bit, there is really no noticeable difference to any computer novice. It’s mainly backend stuff.
Installation:
The Ubuntu installation CD (anything having to do with the ubuntu .iso you downloaded will be referred to as the installation CD for the time being) also acts as a live CD, so when you launch it you get a full desktop with some of the features of Ubuntu.
We are going to install ubuntu, so unless you want to play around with the features first, select the install button.
The Installation page will give you a checklist and a couple options. Make sure the computer you are on meets the requirements. If you have an internet connection on that computer you probably want the installation to download and install updates. Check that box if you do. This makes everything easier in the long run.

The next page asks if you want to erase your entire Hard Disk and use the entire thing or specify partitions manually. This is your choice, if you are dedicating your entire computer to Ubuntu, you can chose to erase the entire disk, but if you are dual booting, or if you have data on other partitions, chose specify partitions manually.
Lets take a look at specifying partitions manually. This is a partition manager program, which allows you to create, delete or change your partitions.
To create a new partition select the partition you want and go to “new partition table”. This will create a new table for you to use, and it might delete the old one. You want to select the new partition as primary, and unless you have a preference chose the partition location as the beginning. If you have free space, go to “add” and specify the partition size.

Below the partition size is a drop down menu that says “use as”. This is asking what file system you want to use on the partition. My favorite file system is the ext4 system, which is the newest but if you have another preference you can choose whichever one you want many people prefer ext3 because it’s supposed to be more stable than ext4. Note that “swap” is not a file system but rather a space for temporary storage.
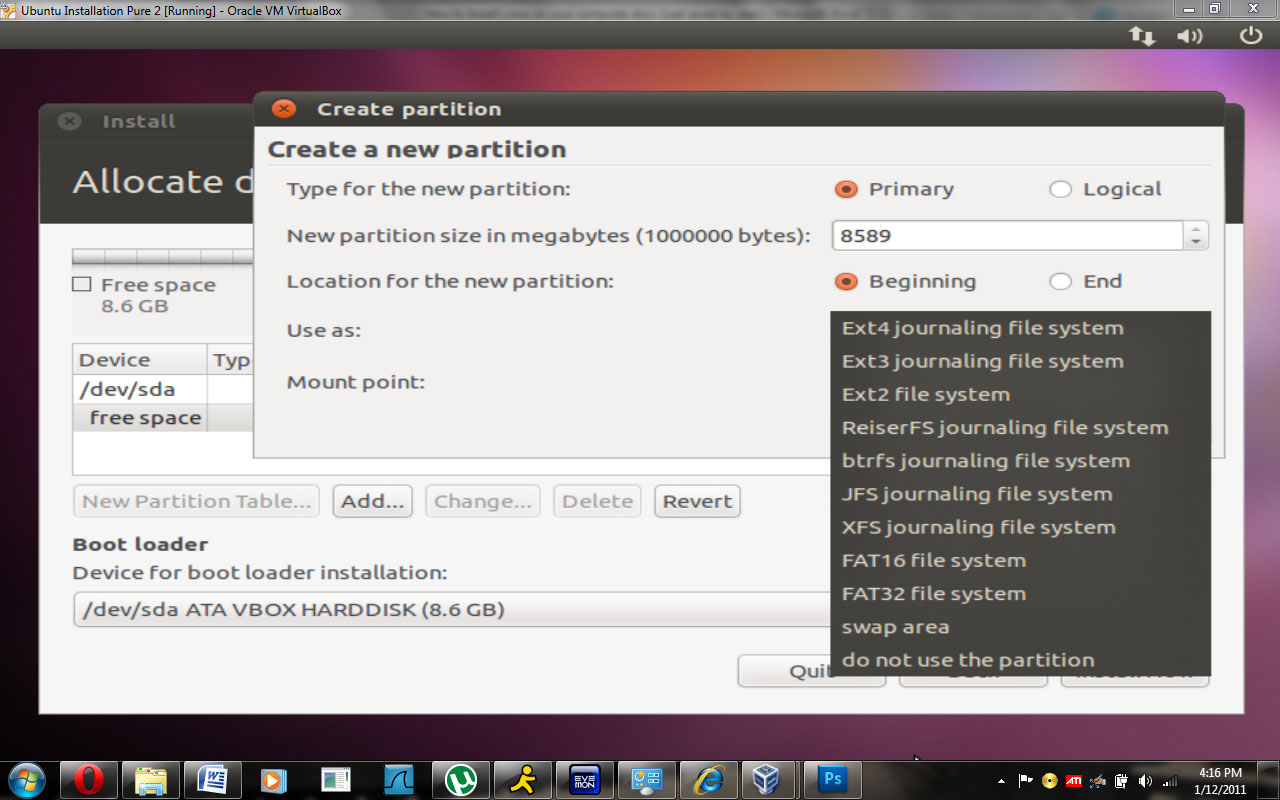
Then create a mount point. The mount point is used as the physical location for your file system. Just type “/” for mount point, nothing else.

After creating your main partition you will want to create a small swap partition. It can be tiny but you need it.
After you are done with that, select the main partition that you want to install Ubuntu on and click install now.
Then go through the customary stuff, closest city, that sort of thing. I know they left some cities out, so select the closest city they have to your location.


While it’s installing you will be asked for keyboard layout, password and usernames that sort of thing.
Then you will be asked to restart and CONGRADULATIONS you have your very own Ubuntu operating system on your computer!
A guide on Duel Booting will be out shortly.
No comments:
Post a Comment